Background

Thursday, July 28, 2011

Homemade Strawberry (Dairy-Free/No Machine) Ice Cream

I made another dairy free ice cream over the weekend that I thought I would share (share the recipe that is...since I pretty much ate all of it by myself:) ) Like I mentioned before, it is great to keep frozen sliced bananas in the freezer because making this ice cream is a nice treat to have, especially when it has been sooo hot lately!  I am so glad that I stumbled upon this easy way to make dairy free, no machine ice cream. I am loving all of the possible flavor combinations you can make! Hope you enjoy :)

Strawberry (Dairy-Free/No Machine) Ice Cream

I used 3 frozen Bananas and mixed in about 2-3 Tablespoons Pecans, 1 teaspoon Vanilla Extract, 1 teaspoon Cinnamon, and 1/4 cup Coconut Milk in the food processor. After it was a smooth consistency, I transferred the ice cream to a large bowl and add in 4-5 chopped frozen strawberries. I put mine in the freezer for a little bit to harden.  I used coconut flakes as a garnish :)

Monday, July 25, 2011

Spaghetti Squash

     I love trying out new foods! I remember having spaghetti squash on occasion growing up, but I have never made it myself. It is a great replacement for pasta noodles and tastes delicious! It is realllly easy to make and I also didn't realize how many "noodles" one squash produces! I think the hardest part was getting the knife through the squash. A couple weeks ago my sister and I both cut ourselves with kitchen utensils within 24 hours so I was still a little afraid of sharp objects in the kitchen...but I was able to slice through this squash without injury :)
     Instead of making a marinara sauce I was able to use leftovers from my ratatouille from the night before. It was scrumptious!! I am excited to go out and buy another squash again soon and try out other toppings. I think a little butter, chopped basil, and a tomatoes would be delish!

Directions:
1. Slice off one end of squash to make it easier to stand up
2. Slice through squash lengthwise. Use a sharp chefs knife....be careful!
3. Scoop out the seeds and insides of both halves
4. Place in a lightly greased (I used olive oil spray) baking dish and poke with a fork
5. Bake in a 350 degree oven for 30-40 minutes or until soft
6. Use a fork to scrap out the "noodles"

I topped mine with my ratatouille :)
Enjoy :)

Friday, July 22, 2011

Ratatouille

source
The first time I tried ratatouille was at a little French restaurant wrapped in a crepe. It was amazing! I loved all of the flavors and it was pretty much all of my favorite vegetables all mixed together.  I went home and had to recreate my new favorite dish hehhehe! I even learned to make crepes and stuffed them with the veggies. This time around, I just made ratatouille on its own with grilled sausage. During the summer I usually have all of the ingredients on hand, so it makes a great dinner when I don't plan what to eat ahead of time :) It is actual really easy to make, the hardest part is getting all of the vegetables cut, but then all you have to do is put them together to mingle their flavors and cook in a large pan. I even used the leftovers with dinner the next night...stay tuned for that one :)

Ratatouille

Ingredients
  • 1 eggplant, diced
  • 2 zucchini, diced
  • 1 yellow squash, diced
  •  8-10 mini yellow, orange, and red peppers (or 2 whole peppers)
  • 1/2 onion, diced
  • 3 garlic cloves, diced
  • handful of basil, chopped
  • large can of diced tomatoes
  • 2 bay leaves
Directions:
1. Cook onions and garlic until translucent
2. Add in peppers, squash, eggplant, basil, bay leaves and tomatoes
3. Cook on medium low heat for 20-30 minutes, covered


Monday, July 18, 2011

...We all scream for ICE CREAM

This is round 2 of my ice cream experimentation. After making my super easy creamy ice cream, I wanted to find a Paleo ice cream that was just as easy to make, dairy free, low sugar, and that didn't need a machine. I found a couple of sites with different variations, but these recipes seemed to be the best. The result definitely isn't as rich and creamy as the first ice cream, but it is very refreshing.  Again, there are many "add-ins" and flavors you can experiment with. The frozen bananas are what give it the ice cream consistency. So now I want to start keeping frozen, sliced bananas in the freezer for when I am craving ice cream.  I made a chocolate, almond butter, and toffee ice cream that was delicious! Hope you are enjoying National Ice Cream Month :)

Ingredients: 


 Directions:

Sunday, July 17, 2011

I Scream, You Scream.....

Yay for ICE CREAM! I absolutely love ice cream! Just like pizza is one of my weaknesses, so is ice cream. Did you know that July is National Ice Cream Month?  Today just happens to be National Ice Cream Day too (The third Sunday of July). I stumbled upon a recipe that doesn't need an ice cream machine. At first I was a little skeptical and thought that it wouldn't taste anything like "real" ice cream. Not only does it turn out creamy and delicious but it is ridiculously easy to make. The base is just Heavy Cream and Sweetened Condensed Milk and then you can pretty much have any kind of "add-in" that you want. I made a coffee, chocolate, and toffee ice cream. My inspiration came from a coffee, chocolate, sugar grinder I got from Trader Joe's last week. It has bits of coffee beans, chocolate chunks, and sugar crystals.  I've been putting in my coffee, but it would be amazing on cupcakes or ice cream too. I will definitely be trying out different variations of the base recipe. I am also in the process of making another homemade, no machine, dairy free, low sugar ice cream! Stay tuned for that recipe :)

Ingredients:
 Directions:
 1. Whip the cream to stiff peaks
2. Mix in any "add ins" to condensed milk (I used about 3 Tbls coffee, 1/2 cup Heath Bits, 1 Tbls Chocolate Syrup)
3. Combine milk and cream and pour into 2 quart container
4. Freeze until hardened (Swirl Magic Shell, Freeze, and break up shell. I repeated this process 2-3 times for lots of chocolate chunks)
5. Enjoy :)


Monday, July 11, 2011

Paleo Pizza

Let me start of by saying I LOVE PIZZA! Pizza is definitely one of my weaknesses and usually my go to meal when I don't feel like cooking! While I have been better about not eating as much pizza as I used to,  I haven't been able to completely say no while trying to eat Paleo! Because of my love for pizza I decided I needed to find a Paleo alternative! I went to my new go to website for Paleo recipes....
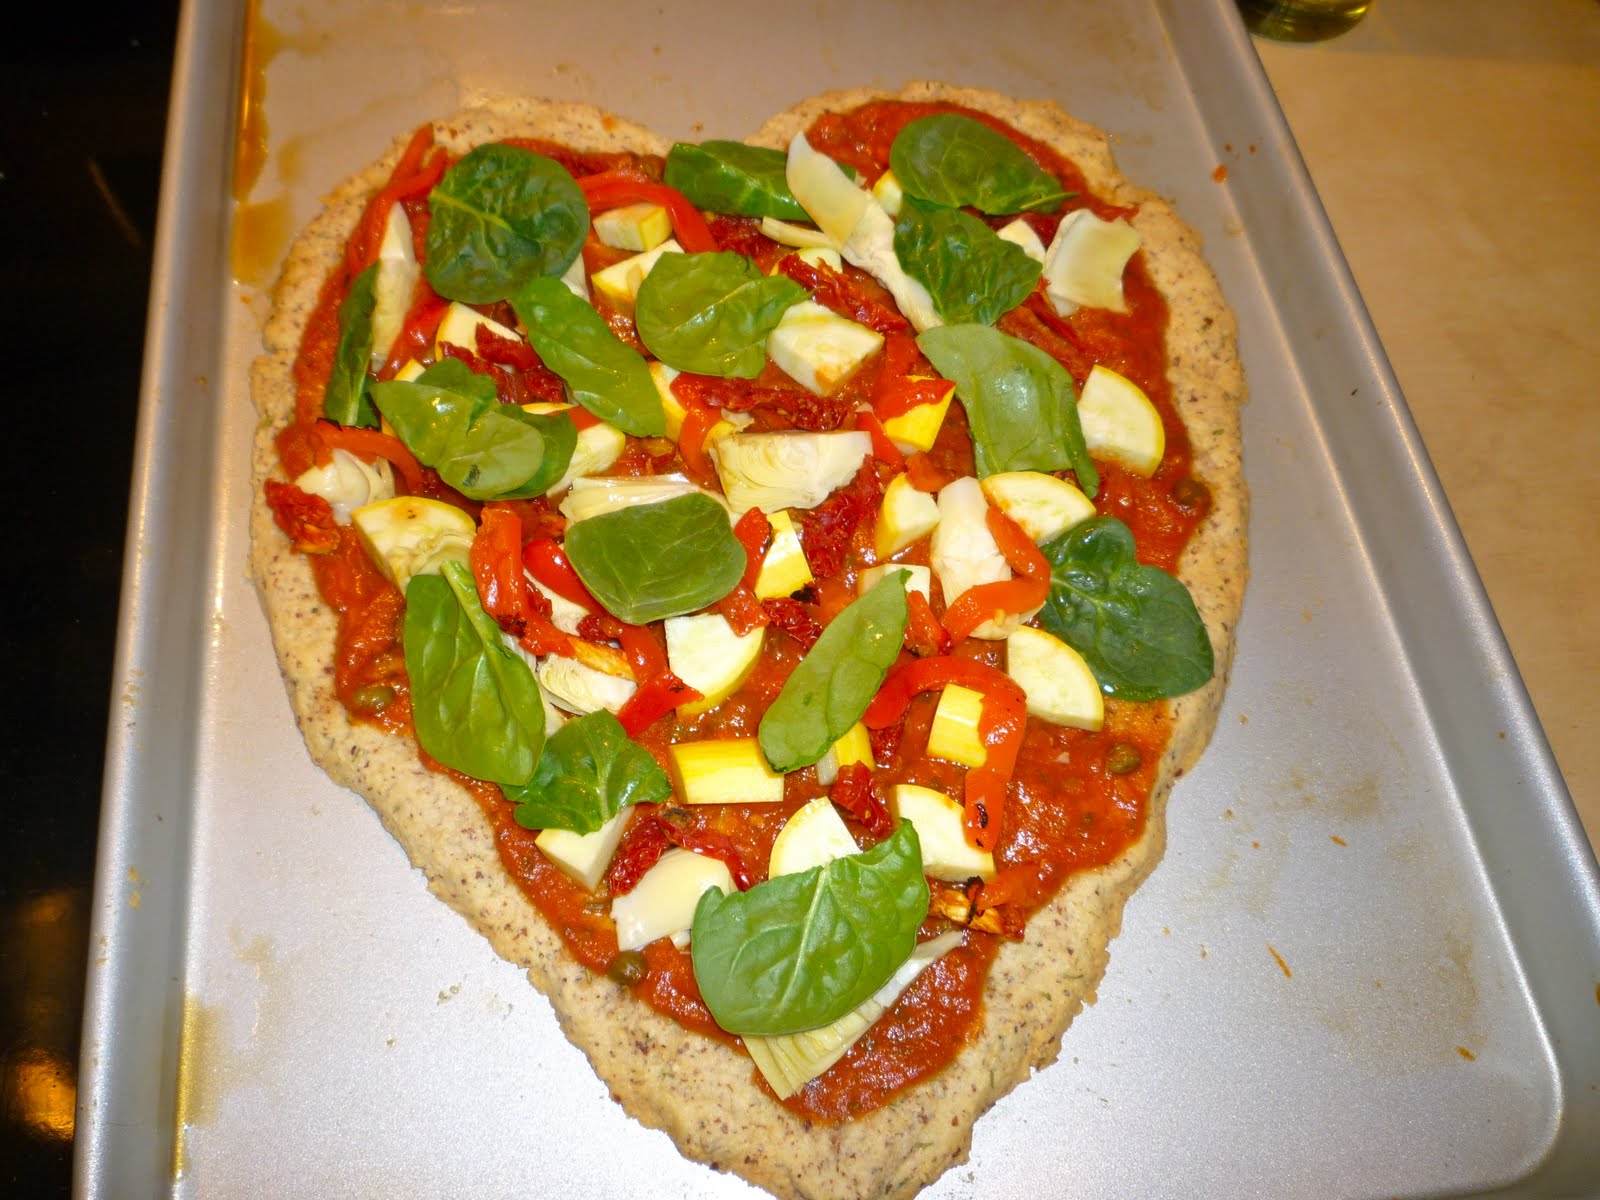
Everyday Paleo. I used her recipe for my crust and got creative with my toppings. I found another recipe out there that used shredded eggplant in the crust with the almond meal, but I decided to play it safe for this first time. In honor of my love for pizza, I made my crust into the shape of a heart :) I also used my fresh rosemary that was planted this week!  While the pizza was in the oven, the smell was amazing, I couldn't wait for it be done to try it! The end result was delish. The crust was more like a crisp cracker and not like a regular pizza crust at all, but it was very tasty overall! I will definitely be making this again, so easy and a great pizza substitute :)

Ingredients:
Crust:
  • 2 cups almond meal
  • 2 eggs
  • 1 teaspoon garlic powder
  • 1/4 teaspoon baking soda
  • 3 Tablespoons olive oil
  • 1 tablespoon rosemary, chopped

Toppings:
I used Trader Joe's Putanesca Sauce because it has capers, olives, garlic, and lots of spices already added to the tomato sauce. I also used artichoke hearts, sun-dried tomatoes, roasted red peppers, yellow squash, and spinach. However, you can use any toppings that you have on hand or like to put on your pizzas!


Directions:
1. Combine all ingredients for crust and form the dough into a ball.

2. Lightly grease pan with olive oil. Use your hands to lightly press dough into desired shape on pan (circle, oval, or heart <3 like I made :)) The dough should be about 1/4 inch thick

3. Bake crust in 350 degrees oven for about 20 minutes 

 4. After crust is done. Spread sauce over the crust and add toppings

 5. Bake in the oven for another 25-30 minutes

Enjoy :)

Friday, July 8, 2011

Bacon-Wrapped Chicken Stuffed Jalapenos

mmmmm....
I just love anything wrapped in bacon! My favorite bacon lately has been the Apple Smoked Bacon from Trader Joes! It is pretty thick, tastes amazing, and relatively inexpensive for bacon. For the Fourth of July I decided to make more of my bacon wrapped deliciousness for appetizers! I have been wanting to make my own jalapeno poppers, so I was very excited when I discovered a "paleo-friendly" version. I also got very excited when I went to a BBQ the day before and they were making a jalapeno popper and they used a skewer to attach all of the "poppers" while grilling (I used toothpicks to secure and then a skewer to attach them all as well to make it easier to move them on the grill). I made my stuffed dates again, but this time I grilled them (which were AMAZING by the way!)


Bacon-Wrapped Chicken Stuffed Jalapenos
Ingredients:
  • Jalapenos
  • Chicken (cooked and sliced)
  • Bacon
Directions:
1. Slice jalapenos in half and scoop out seeds
2. Place cooked chicken inside pepper
3. Wrap in bacon that has been sliced in halves or thirds (depending on the desired length of bacon)
4. Use a toothpick to hold everything together
5. Skewer jalapenos for grilling (or place on parchment lined pan to cook in oven)
6. Grill until bacon is crisp
 
Jalapenos, chicken, and bacon skewered and ready to grill!

Grill until bacon is cooked and crisp---check out that fire!!  
Grilled Bacon-Wrapped Dates


Grilled Bacon-Wrapped Chicken Stuffed Jalapenos...Enjoy :)

Monday, July 4, 2011

Strawberry Popsicles

I just love the summer time! It has been ridiculously hot so I needed something to help cool me down. The answer to that was POPSICLES! These were super easy and only needed two ingredients. They are great to have in the freezer for a sweet refreshing treat during these hot summer months! I found another recipe that I am going to try later this week that is more like a fudgesicle!

Ingredients:   
Directions:
1. Remove stems of strawberries and slice in halves or quarters
2. Combine strawberries and coconut milk in blender until smooth
3. Pour mixture into popsicle molds and freeze for at least 4 hours or until frozen


Sunday, July 3, 2011

Bacon-Wrapped Pecan Stuffed Dates

There are a few restaurants in town that we have ordered bacon wrapped dates and I loved them so much I wanted to recreate this wonderful treat at home. These are definitely going to be made again and are great for little appetizers for a party. Just be sure you don't eat them all before serving!

Ingredients:

 
Dates, Bacon, and Pecans


Directions:
1. Slice dates and remove seeds. Slice bacon in thirds or in half


2. Stuff dates with pecans

3. Wrap dates with bacon and secure with a toothpick
4. Bake in 400 degree oven for about 12 minutes
 ( I would recommend using parchment paper so they don't stick)


  Enjoy :)

There will be more bacon wrapped deliousness later this week :)